This post will help you out if: you use the Google Maps website on a PC or Tablet, using any internet browser (Chrome, Internet Explorer etc.)
If, like me (and most of the world), you’ve not been getting out and about as much over the past year, you might be feeling a little anxious about making long journeys now that things are starting to open up. If you’re planning a journey by car, bus, train, tram, bike or even plane, you can use Google Maps to find the best way to get from A to B.
I’m going to show you how to use a particular feature on Google Maps, called Street View, that I find really useful when I’m planning a trip to an unfamiliar place. The instructions below are for the Google Maps website, not the app (you can use Street View on the app, too, but I prefer to use a decent-sized screen for this). The app can talk you through directions whilst you’re on you’re journey, but I like to use the website for Street View before I travel, so I know ahead of time if there are any tricky bits to watch out for.
Step 1: Open Google Maps through a web browser
You can get to the Google Maps website by typing in www.google.com/maps into the top bar of your browser on your computer (or click here). It should automatically display a map of your local area (or wherever Google thinks you are right now).
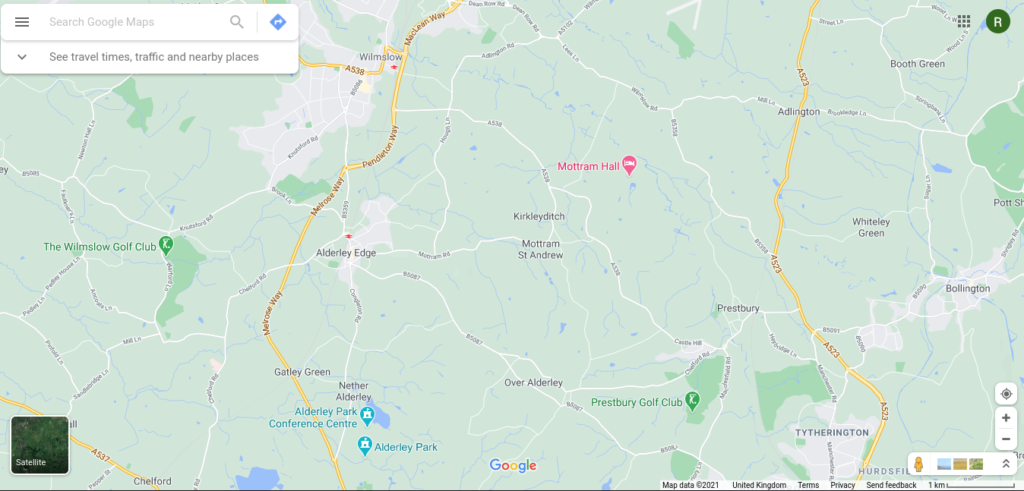
At the bottom right you’ll see the scale of the map, and above it some symbols. Clicking on the + and – will let you zoom in and out. The three rectangles that look like photos bring up a lot of photos from the local area along the bottom of the screen. The yellow person is important, but I’ll come back to that later…
Step 2: Get directions for your journey
In the white box in the top left corner, there’s a blue rotated square with a white arrow inside. When you hover over it with your mouse, the word ‘directions’ should appear. Click there and you’ll bring up the following box:
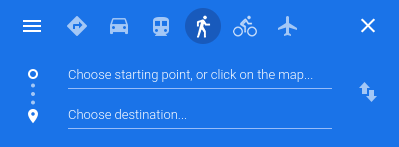
The symbols along the top let you chose how you’ll be travelling: by car, ‘transit’ (public transport), walking, cycling or flying. Clicking the symbol to the left of the car gets Google to choose for you. In the two boxes below, type in your starting point and where you’re going to. Once you start typing, Google Maps will try to guess where you mean, and offer you a choice of places. You can put in postcodes, street names, or the name of a place if it’s likely to be named on the map (such as a hospital or tourist attraction). Clicking the two up and down arrows to the right swaps the order of the places so you can plan a return journey too. Instead of typing, you can also click on a location on the map, but this can be tricky to do precisely.
Once you’ve entered both a start and end point, a few things will happen automatically:
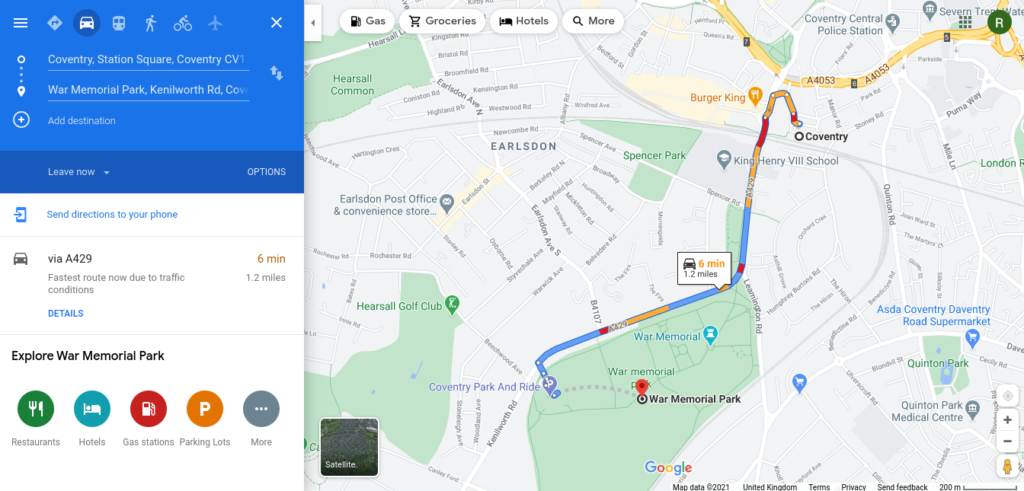
- Google Maps will calculate the best route for your chosen mode of travel, and show it on the map as a single route in colour, and sometimes with alternative routes in grey. You can click on the different routes to pick the one you want to use.
- In the blue box, you’ll now be offered the chance to ‘Add destination’, if you plan to go on to somewhere else afterwards, or you want to go via a certain place.
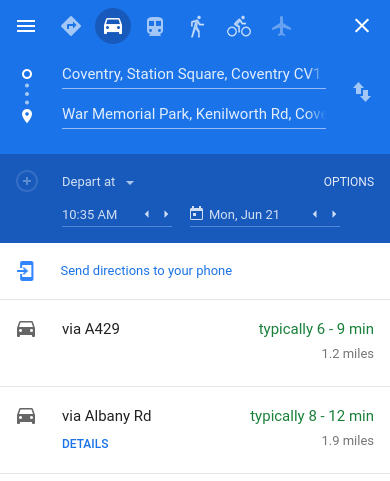
- In the darker blue bar at the bottom of the blue box, you can set the time and date of your journey by clicking ‘leave now’ and changing the details it brings up. This isn’t an option for walking or cycling, but for driving and public transport it can give you relevant traffic information and bus/train/tram times, so it’s a really handy feature.
- Selecting ‘options’ in the same dark blue bar lets you choose if you want the distances in miles or kilometres, and if you want to avoid things like motorways (‘highways’), toll roads and ferry crossings.
Step 3: Use Street View to look at key junctions and landmarks
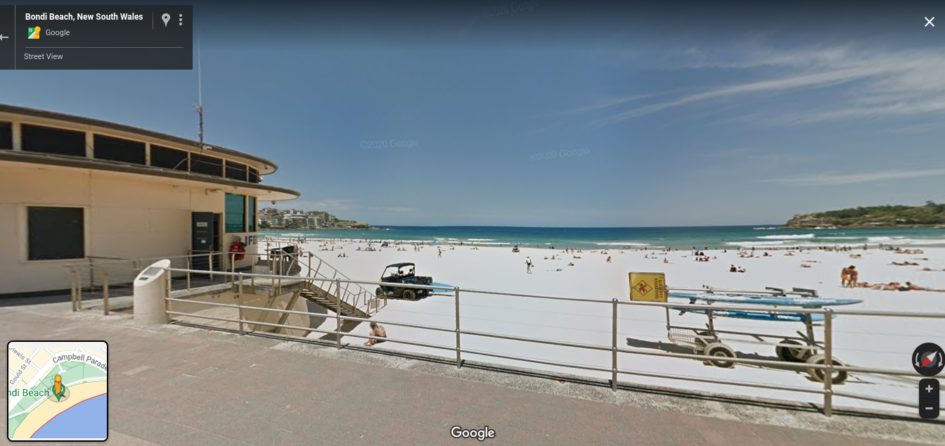
You’ll notice that the yellow person is still in the bottom right corner of the screen. Click on it and hold your left mouse button down whilst you drag the person on to the map. It will look like the little person is holding on to your mouse arrow, which will have changed to a white hand shape, and there will be a green circle underneath. If you release the mouse button, the person will drop onto the map wherever the green circle was, and you’ll be transported into Street View at that location:
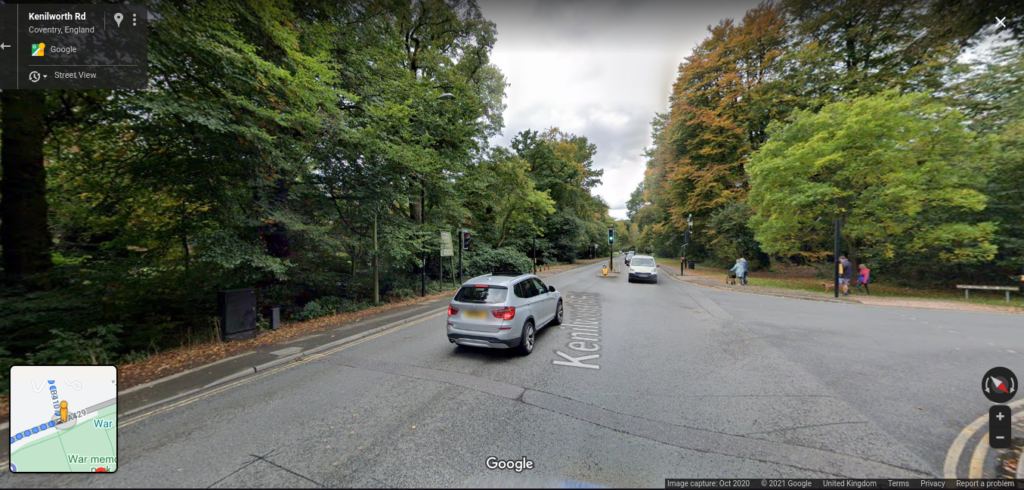
In the bottom left corner you can still see where you are on the map, and the coloured line for your planned journey, but the screen is now taken up with an image of the location, so you can see what that bit of the journey actually looks like. The black bar at the bottom right tells you when the photo was taken, and you also have + and – buttons for zooming in and out, and a compass arrow (red is north).
Step 4: Move around in Street View
I reckon the best part of using Google Maps is that you can ‘travel’ the whole of your journey in advance if you want to, just by navigating through Street View. You can check whether pavements are accessible, or whether there are any potential driving hazards such as blind junctions, and make a note of landmarks approaching junctions so you’ll know when to prepare to turn off. If you’re familiar with the game Geoguessr this next part will be easy (and fun!).
To move forwards on the Street View screen, just position your mouse arrow (it’s still a little white hand) where you want to go, then left-click your mouse and it’ll move you there. To turn or look around, click and hold down your left mouse button and drag your mouse to the left or right before letting go.
It’s quite hard to show this step in photos, so I’ve made a short video which you can see below or if you’re having problems click here to watch.
Step 5: Print maps and directions or send them to your phone
Whilst you’re still in Street View, look at the box at the top right hand corner:
Selecting the three dots will give you an option to print that image, and any notes you want to add about it too. This is really useful if you’re worried that you’ll forget what a particular junction looks like, or the entrance to an unfamiliar building.
To print the actual map, click the back arrow in that same box, and you’ll go back to your original map view.
In the box to the left of the screen, you’ll get the option to ‘send directions to your phone’. Clicking this, you’ll get some more options which will allow you to choose an Android phone (if you’ve got one synced with your Google account), or to email directions to your email address, or to text them to a phone number that you can enter or edit. I find it useful to have printouts though, in case I run out of phone battery or signal on a long journey.
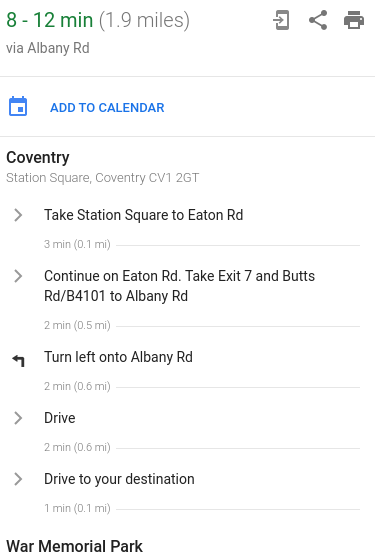
To print the map and directions, select which route you want from the box, and you’ll get a breakdown of the directions, and a printer symbol in the top right of the box:
Clicking on the printer symbol gives you the option to print with or without the map:
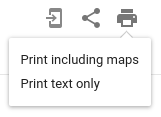
Choose what you’d prefer (I’m quite a visual person, so it’s maps every time for me), then once you’ve added any notes press the blue ‘print’ button in the top right of the screen. If you’re connected to your printer then you’ll get your usual print options screen from there.
Navigating with Street View can be so helpful (and even mildly addictive), so I hope this guide has given you more confidence planning unfamiliar journeys. And if you’re going anywhere nice, don’t forget to send us a postcard 🙂 Robin.