Hot on the heels of my guide to not getting locked out of your Google Account, comes this, a guide on how not to get locked out of your Microsoft Account. Some might say I’m writing a mini-series of these…
This applies to all Microsoft accounts as well as @outlook and @hotmail email addresses.
If I got locked out of my work or home Microsoft Account then I think I’d be very stuck.
Here are some simple steps you can take to make sure you don’t get locked out of your Microsoft Account.
Here’s what I’m going to cover:
- Checking your name, phone number, address and date of birth
- Adding backup phone numbers and email addresses
- Generating and saving a Recovery Code
- And one last note that I’m not going to cover here
Tip: You might want to print this guide out and tick off the bits as you go. Remember to note down any details you give them – if you give them your phone number, for example, make a note of which number you give them.
Your Details
The first thing to check is the ‘your profile’ screen. Make sure the details are correct, that you have a Date of Birth set and that the email address is one you use.
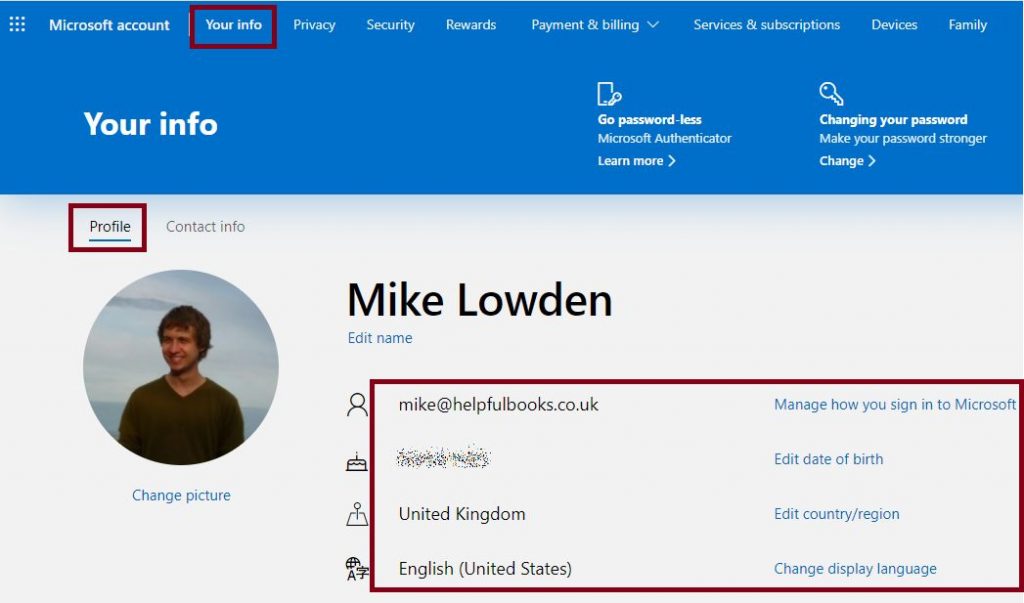
- Head over to https://account.microsoft.com/profile/ and check the details shown are correct.
- If any are wrong click on “Edit”. If they don’t have your real date of birth either click Edit and put your real one in, or make a note of the fake one. (Note: Make sure you’re over 18 if you make up a birthday, and write it down somewhere safe)
Contact Info
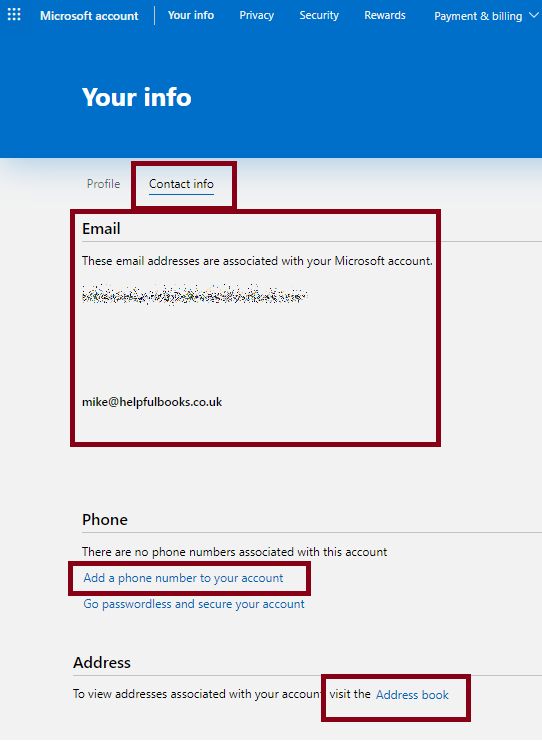
- Go to https://account.microsoft.com/profile/contact-info
- Check the email addresses you have listed. These aren’t the backup email addresses (which we’ll come onto in a moment) but these are the ones you can use to log into your Microsoft Account. Don’t worry if you spot one you don’t use. If you spot anything odd or can’t see the email address you usually use for your Microsoft Account just drop us a message and we’ll do our best to help out.
- Check there is a phone number linked to your account. If not click “Add a phone number to your account” and follow the prompts. Again this isn’t a backup phone number, we’ll come onto backup phone numbers in a moment.
- Scroll down the page a little and add a postal address to the account – if this isn’t your home address make a note of which address you’ve added.
Backup Phone and Email
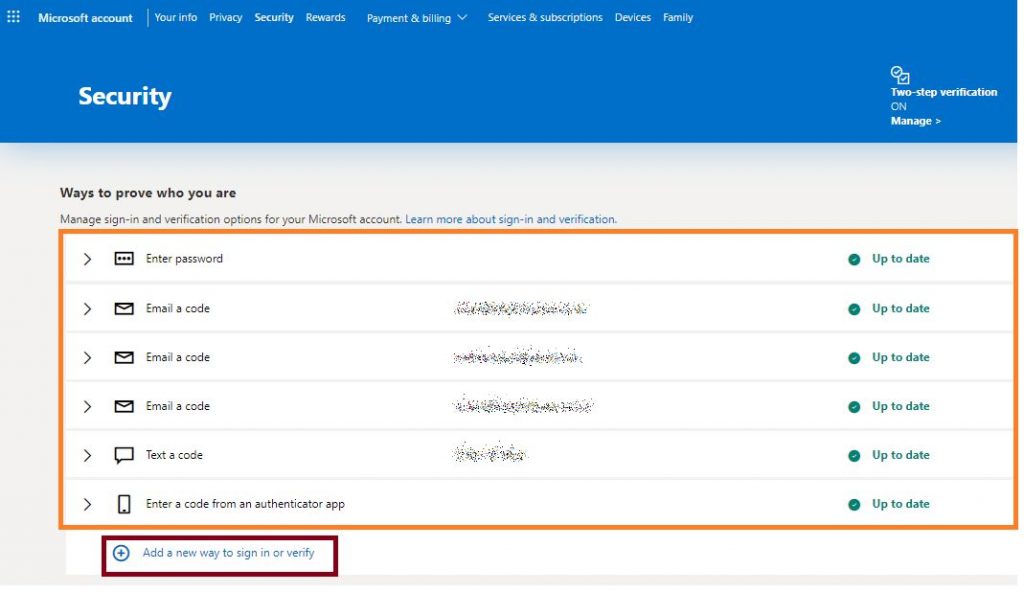
- Go to the “additional security” page here https://account.live.com/proofs/manage/additional
- Scan down the list of “Ways to prove who you are”, what we want here is some different ways to prove who you are. For example, I have a couple of backup email addresses, a phone number and an app on my phone I can use to verify my identity.
- Click on “Add a new way to sign in or verify” and add any you can, for example, add a phone number or alternative email address. I’d suggest having at least 3 things on this list.
Backup Recovery code
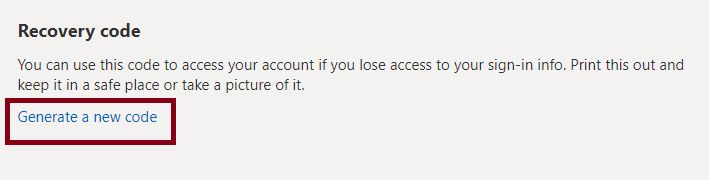
- On the same screen as the backup email and phone numbers above https://account.live.com/proofs/manage/additional scroll down.
- Look for “Recovery Code”
- Click “Generate a new code”
- Save this code somewhere safe, ideally print it out, or write it in the back of your password book, or save it in your password manager (for example LastPass). Probably best not to have it tattooed onto your arm though…
Adding Payment Methods
This isn’t something I’m going to cover here, but if you’ve bought something from the Microsoft Store, or even just added your payment details for a free trial, then Microsoft can sometimes use this to verify your identity and help you recover your account.
If this is something you’d like to do, come and have a chat with us about this and adding 2-factor sign in to your account.
And that’s it!
Thanks
Mike 🙂